Databricks on any cloud
Cluster Setup
When running on top of Databricks, you can make complete abstraction of the Cloud provider. You juste need to setup a Databricks cluster that will make use of the compute and storage resources provided by the underlying cloud provider. Follow the steps below to run starlake on top of Databricks:
- Create a service account
- Create a Databricks cluster
- Mount the Databricks File System
- Create a Starlake job
- Ingest your data
The screenshots below are taken from a Databricks cluster running on Google Cloud but are also valid for Azure and AWS.
Create a service account
- Azure
- Google Cloud Platform
Create a storage account and name it for example starlakestorage and assigns it to a resource group. In this storage account create a container that you can name starlake-app and set its public access level to Container. This container will have the following purposes:
- Store Starlake jars
- Store Starlake metadata
- Store parquet files after ingestion
But you can also distribute these tasks across several containers.
Create a bucket and name it for example starlake-app. This bucket will have the following purposes:
- Store Starlake jars
- Store Starlake metadata
- Store parquet files after ingestion
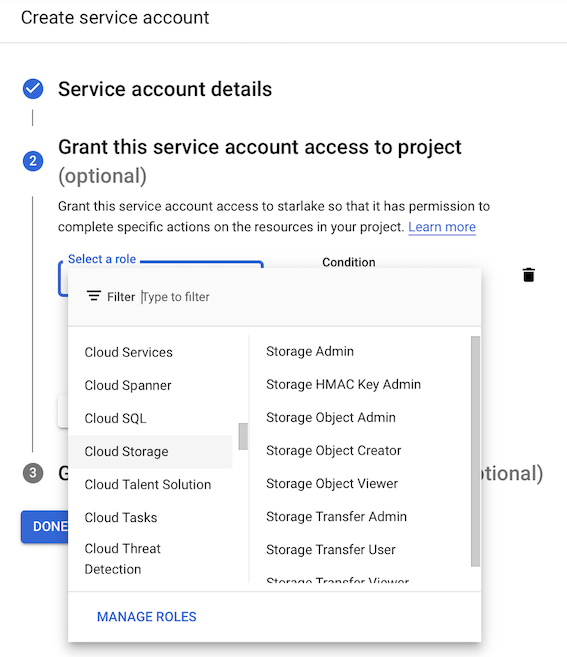
Create a service account and assign it the Storage Admin role.
Create a Databricks Cluster
In a Databricks Workspace, create a cluster with the correct Databricks Runtime version: 9.1 LTS (Apache Spark 3.1.2, Scala 2.12).
- Azure
- Google Cloud Platform
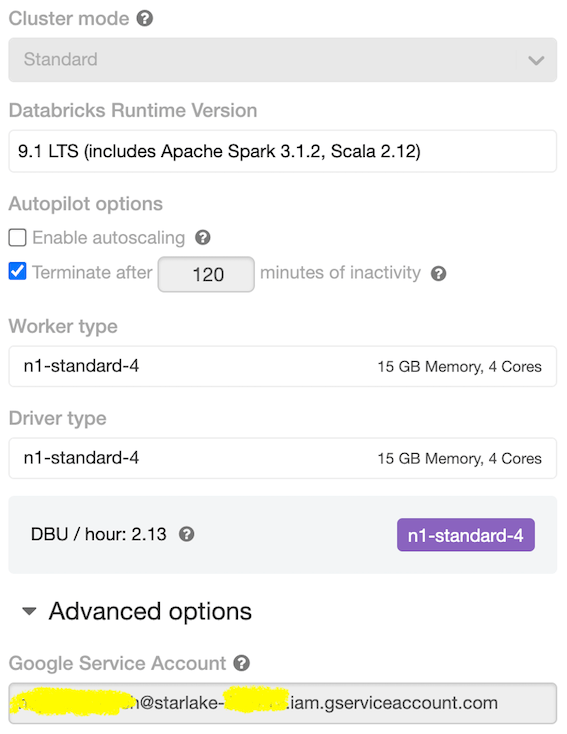
In this section you don't have to set service account variables, we will set it when mounting our container. Just copy your storage account access key we will use it later in a notebook.
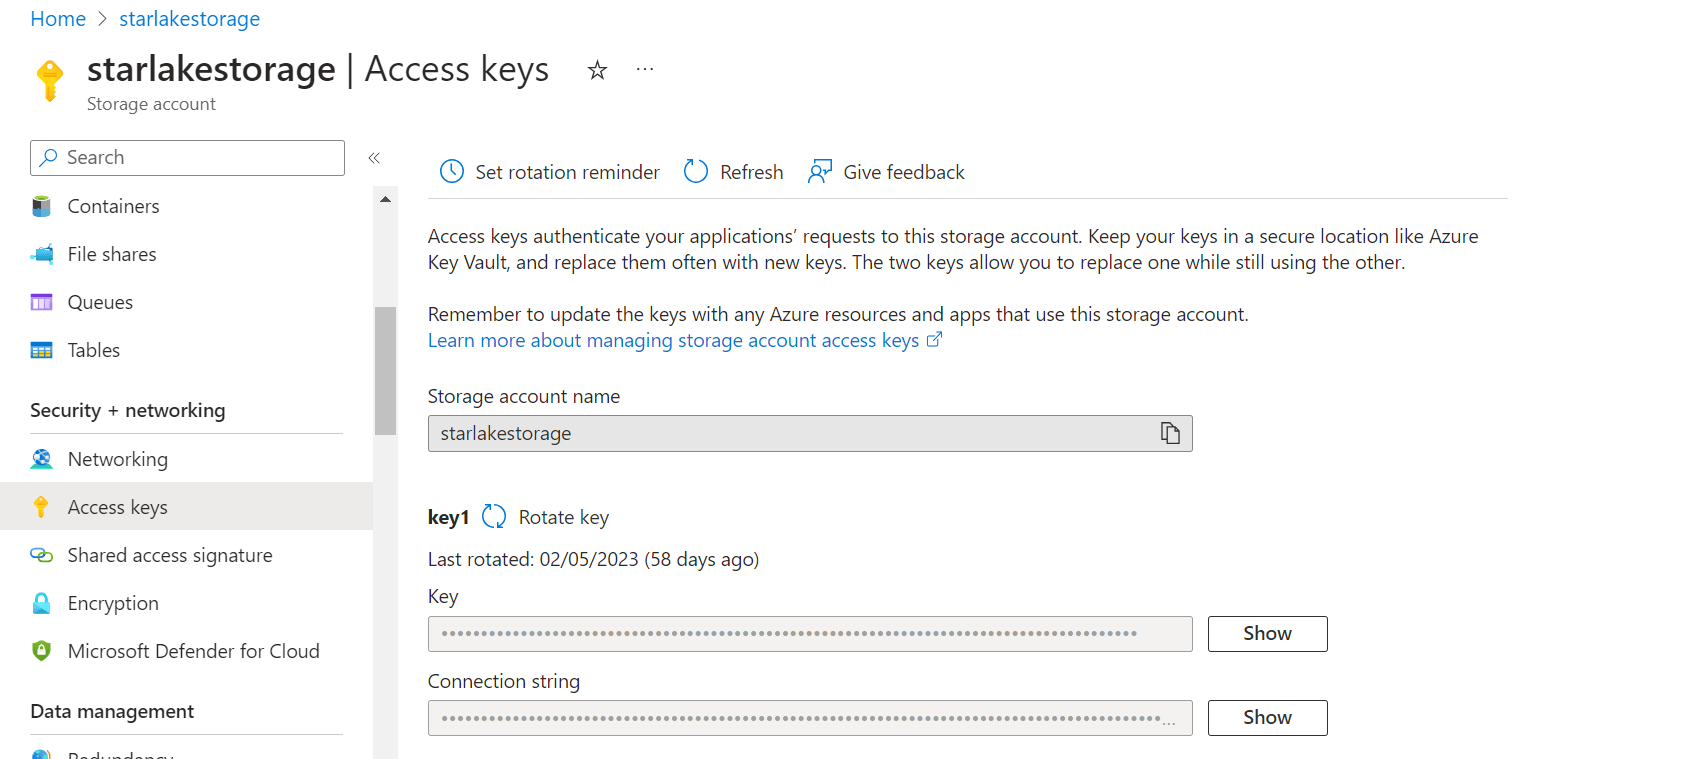
Set the value of the Service Account field name to the service account you just create in the step above.
In the Advanced Settings / Spark Config page set the variables below:

| Spark Config entry | Value | Description |
|---|---|---|
| spark.hadoop.google.cloud.auth.service.account.enable | true | Enable service account auth |
| spark.hadoop.fs.gs.auth.service.account.email | [email protected] | Service account name |
| spark.hadoop.fs.gs.project.id | my-project-id-123456 | Project id |
| spark.hadoop.fs.gs.auth.service.account.private.key | -----BEGIN PRIVATE KEY----- YOUR PRIVATE KEY GOES HERE-----END PRIVATE KEY----- | Private key as defined in your JSON file by the attribute private_key |
| spark.hadoop.fs.gs.auth.service.account.private.key.id | df728e47e5e6c14402fafe6d39a3b8792a9967c7 | Private key as defined in your JSON file by the attribute private_key_id |
Environment Variables
In the Advanced Settings / Environment variables section set the variables below:
| Environnement variable | Value | Description |
|---|---|---|
| SL_METRICS_ACTIVE | true | Should we compute metrics set on individuals table columns at ingestion time |
| SL_ROOT | /mnt/starlake-app/tmp/userguide | This is a DBFS mounted directory (see below). It should reference the base directory where your starlake metadata is located |
| SL_AUDIT_SINK_TYPE | BigQuerySink | Where to save audit logs. Here we decide to save it in BigQuery. To have it as a hive table or file on the cloud storage, set it to FsSink |
| SL_FS | dbfs:// | Filesystem. Always set it to DBFS in Databricks. |
| SL_HIVE | true | Should we store the resulting parquet files as Databricks tables ? |
| TEMPORARY_GCS_BUCKET | starlake-app | Bucket name where Google Cloud API store temporary files when saving data to BigQuery. Don't add this one if you're on Azure |
Mount DBFS
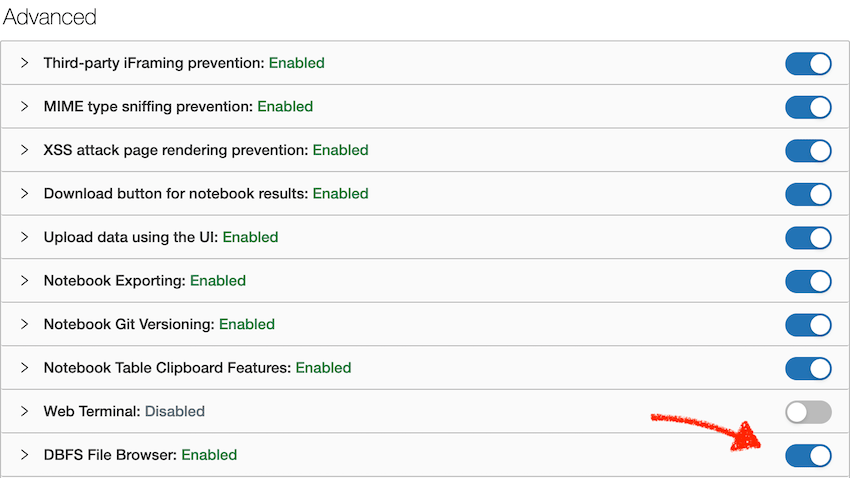
Databricks virtualize the underlying filesystem through DBFS. We first need to enable it in Admin Console / Workspace Settings page:
We now inside a notebook mount the cloud storage bucket created above and referenced in the cluster environment variables into DBFS:
- Azure
- Google Cloud Platform
storage_name= "starlakestorage"
container_name = "starlake-app"
storage_acces_key = "Your access key"
mount_name = "starlake-app"
dbutils.fs.mount(
  source="wasbs://%s@%s.blob.core.windows.net" % (container_name, storage_name),
  mount_point="/mnt/%s" % mount_name,
  extra_configs = {
    "fs.azure.account.key.%s.blob.core.windows.net" % storage_name: storage_acces_key
  }
)
bucket_name = "starlake-app"
mount_name = "starlake-app"
dbutils.fs.mount("gs://%s" % bucket_name, "/mnt/%s" % mount_name)
display(dbutils.fs.ls("/mnt/%s" % mount_name))
Your storage account is now accessible on Databricks as a folder from Spark as the folder dbfs:/mnt/starlake-app
Create a Starlake job
To create a starlake job, you first upload the starlake uber jar and the jackson yaml (de)serializer into the gs://starlake-app folder or starlake-app container
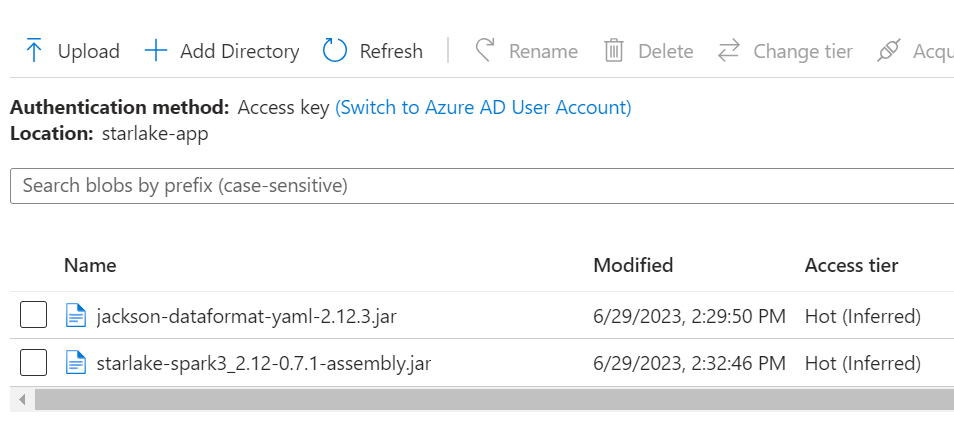
The version of the jackson-dataformat-yaml depends follows the version
of the others jackson components referenced by the databricks runtime. Download the correct version on Maven Central. Then add the starlake assembly jar that you can find here.
Note that only import, watch/load/ingest, transform and metrics command lines are designed exclusively for production environments
You will need first to write your metadata configuration files from a local environment and then upload your starlake project in the SL_ROOT location like this:
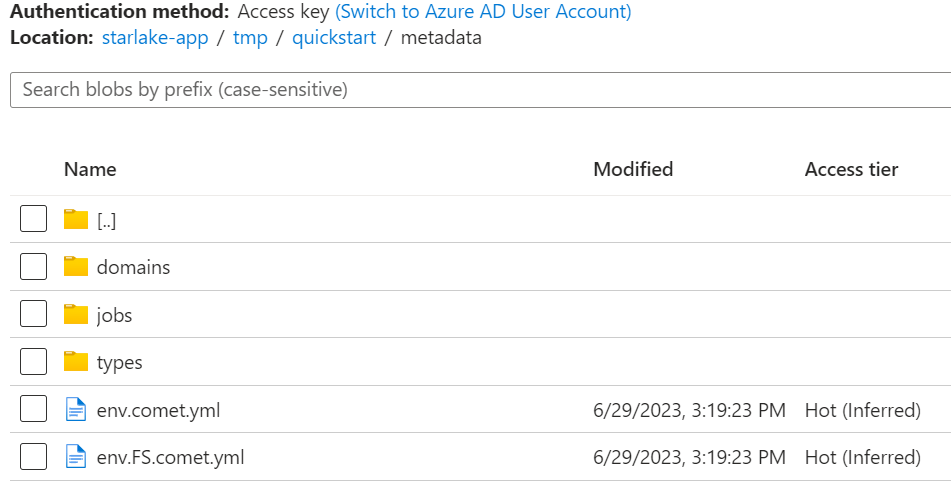
If you are working with an external data source, you can mount your data incoming location in databricks and reference it in the env.sl.yml file:
env:
  root_path: "/mnt/starlake/tmp/userguide"
  incoming_path: "/mnt/sample-data"
Then reference your data source by using {{incoming_path}} variable in the domains schemas
load:
  name: "HR"
  metadata:
    mode: "FILE"
    format: "JSON"
    encoding: "UTF-8"
    multiline: false
    array: true
    separator: "["
    quote: "\""
    escape: "\\"
    write: "APPEND"
    directory: "{{incoming_path}}/HR"
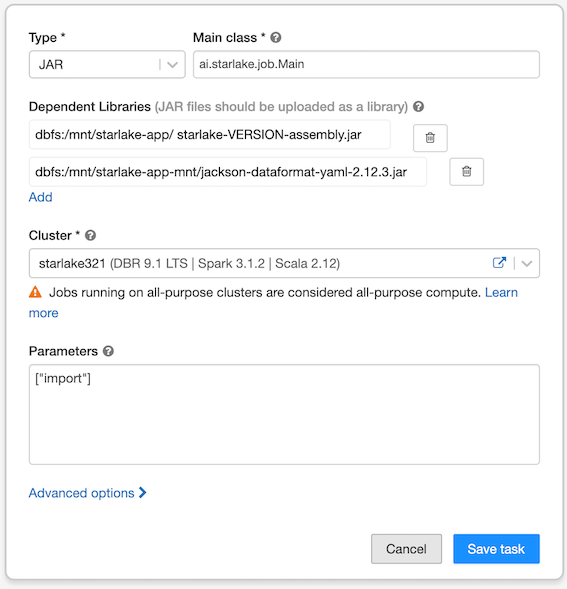
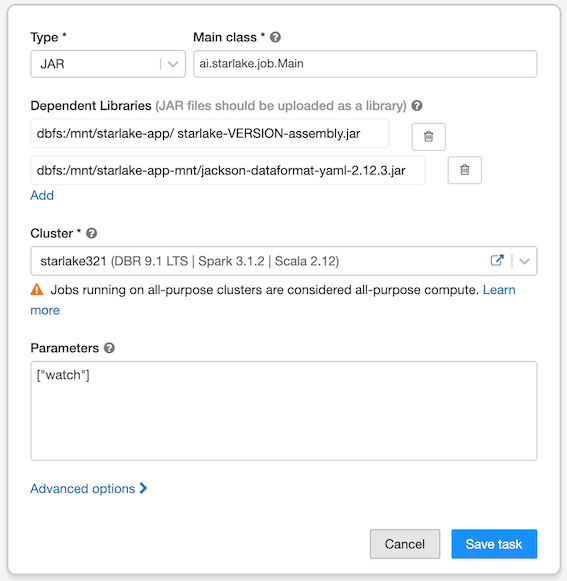
Create tasks and reference the two jars you uploaded and are now visible to databricks through the dbfs:/mnt/starlake-app mount
- The first task (
import) will copy the files matching the expected patterns into the pending directory for ingestion by starlake
- The second task (
watch) will run the starlake ingestion job store the result as parquet files in your dataset directory
Ingest your data
Start the import task first and then the watch task. The execution logs are available through the runs tab:

Since we set the SL_HIVE=true environnment variable, ingested data are also available as tables
The audit log for the above tasks will be stored in a BigQuery table if we set SL_AUDIT_SINK_TYPE=BigQuerySink environnment variable