Tutorial
Starlake is not an orchestrator. It generates DAGs for you to run on your orchestrator of choice.
Now that our load and transform are working, we can run them on our orchestrator.
Starlake can generate DAGs for different orchestrators: Airflow, Dagster, and Snowflake Tasks.
Prerequisites
Make sure you run the Transform step first to get the data in the database.
On Snowflake, you need to login with a role with the CREATE TASK and USAGE privileges.
Running the DAG
Using starlake dag-generate command, we can generate a DAG file that will run our load and transform tasks.
starlake dag-generate --clean
This will generate your DAG files in the root of the dags/generated directory.
You may also 'dry-run' the DAGs to see if they are working as expected.
python -m ai.starlake.orchestration --file {{file}} dry-run
where {{file}} is the path to the DAG file you want to run (dags/generated in our example).
- In Snowflake: This will display all the SQL commands that will be run.
- In Airflow: This will run the DAG in test mode.
- In Dagster: This will run the DAG in local mode.
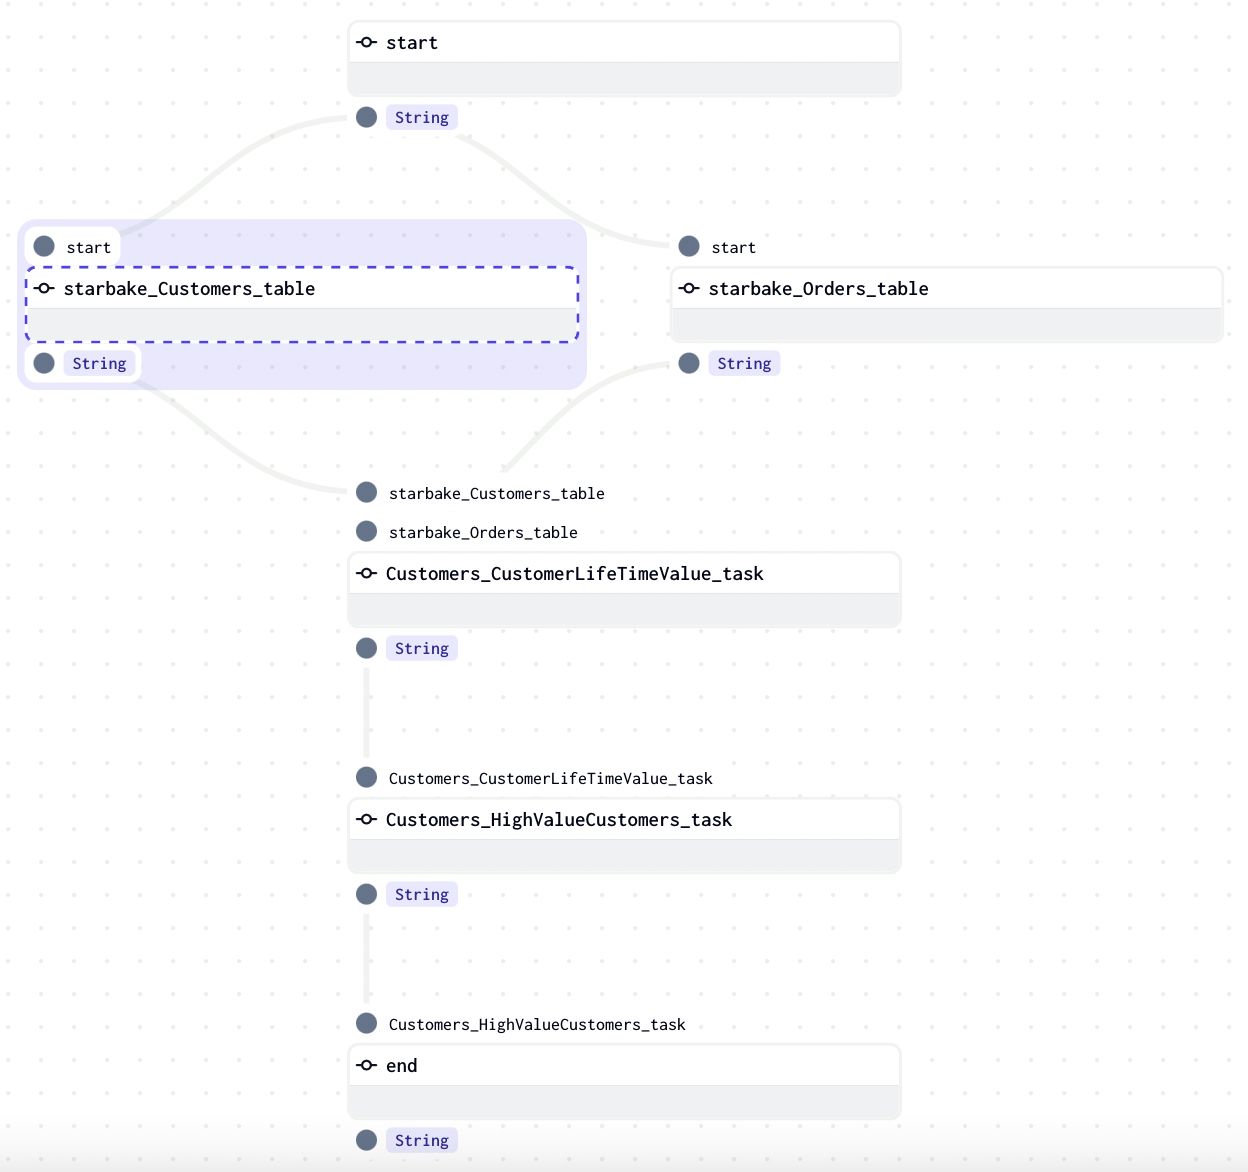
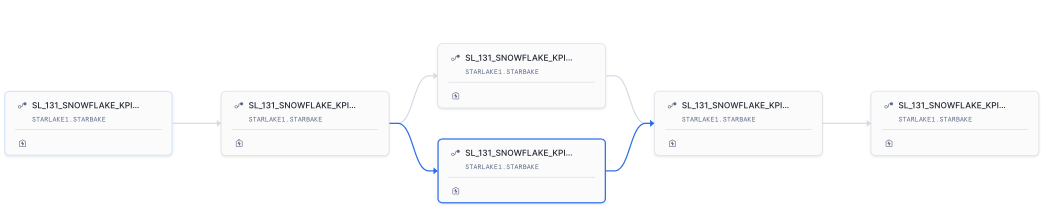
We are now ready to deploy the DAGs directly on our orchestrator.
python -m ai.starlake.orchestration --file {{file}} deploy
This will deploy the DAGs to your orchestrator.
- Airflow
- Dagster
- Snowflake Tasks

![]()
Backfilling
You can backfill the DAGs to run them on a specific date range.
python -m ai.starlake.orchestration  \
        --file {{file}} backfill     \
        --start-date {{start_date}}  \
        --end-date {{end_date}}
Where {{start_date}} and {{end_date}} are the start and end dates of the range you want to run the DAGs on.
Configuration
The DAG generation is based on configuration files located in the metadata/dags directory.
You put there the configuration files for the DAGs you want to generate and reference them globally in the metadata/application.sl.yml file
or specifically for each load or transform task through the dagRef attribute.
See the Configuration page for details on how to structure DAG configurations and the Options Reference for a complete list of available options.
- Airflow
- Dagster
- Snowflake Tasks
dag:
    comment: "default Airflow DAG configuration for load"
    template: "load/airflow_scheduled_table_bash.py.j2"
    filename: "airflow_all_tables.py"
    options:
        pre_load_strategy: "imported"
dag:
    comment: "default Airflow DAG configuration for transform"
    template: "transform/airflow_scheduled_task_bash.py.j2"
    filename: "airflow_all_tasks.py"
    options:
        run_dependencies_first: "true"
dag:
    comment: "default Dagster pipeline configuration for load"
    template: "load/dagster_scheduled_table_shell.py.j2"
    filename: "dagster_all_load.py"
    options:
        pre_load_strategy: "imported"
dag:
    comment: "default Dagster pipeline configuration for transform"
    template: "transform/dagster_scheduled_task_shell.py.j2"
    filename: "dagster_all_tasks.py"
    options:
        run_dependencies_first: "true"
dag:
    comment: "default Snowflake pipeline configuration for load"
    template: "load/snowflake_load_sql.py.j2"
    filename: "snowflake_{{domain}}_{{table}}.py"
dag:
    comment: "default Snowflake pipeline configuration for transform"
    template: "transform/snowflake_scheduled_transform_sql.py.j2"
    filename: "snowflake_{{domain}}_tasks.py"
    options:
        run_dependencies_first: "true"
The options property is where all the magic happens. It allows you to configure the behavior of the generated DAGs.
The next pages cover:
- Configuration — DAG configuration structure, references, and properties
- Options Reference — Complete reference for all available options
- Customization — Templates, advanced customization, and dependency management